Vertical space is the most underutilised dimension in small kitchens. While homeowners obsess over floor area, the real storage opportunity stretches upward — from counter height all the way to the ceiling and beyond.
Most kitchen designs optimise for the zone between knee and eye height — roughly 80cm of usable space. But a standard kitchen ceiling sits 240–260cm above the floor. That leaves over 160cm of vertical potential almost entirely ignored.
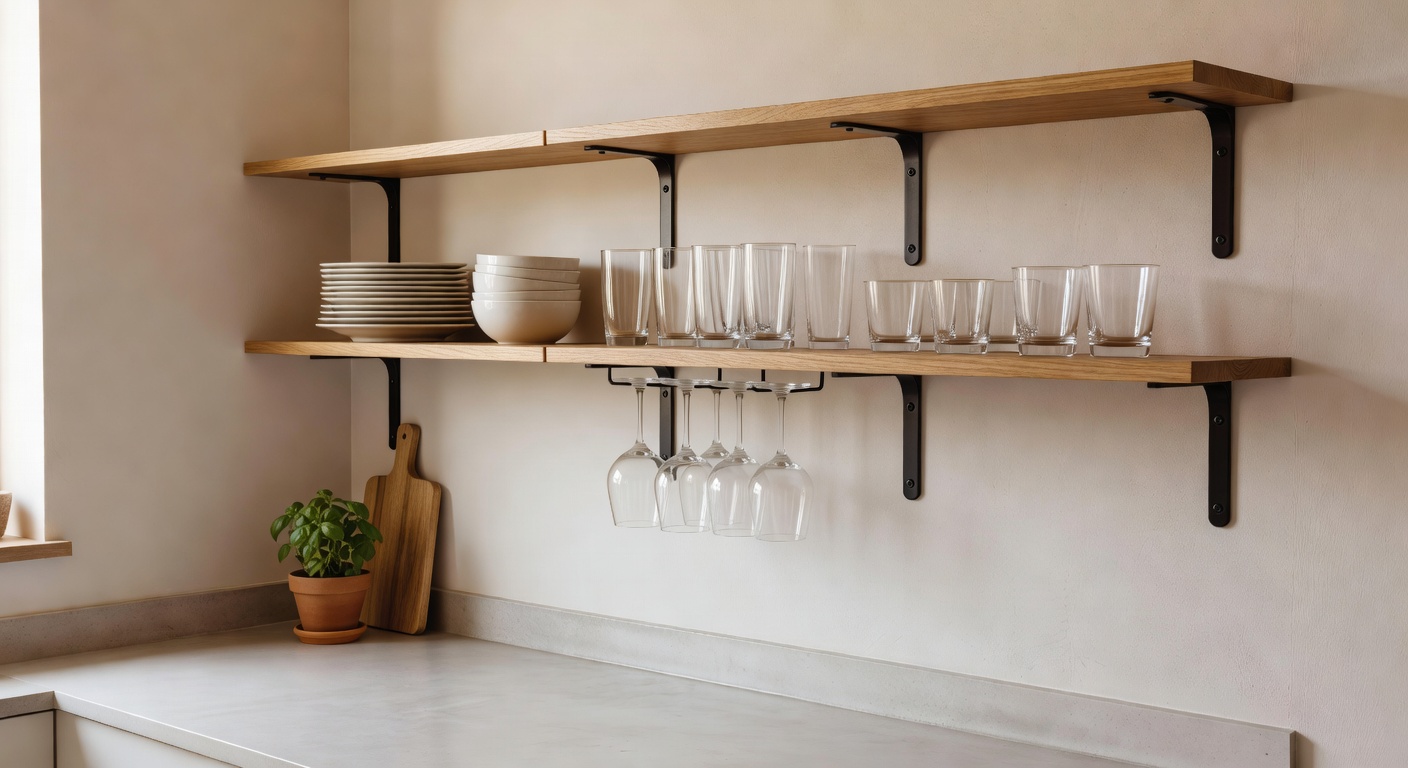
Rethinking storage vertically doesn't require structural renovation. Wall shelves, ceiling racks, door-back organisers, and tall cabinets all deploy existing surfaces — surfaces you already own — to dramatically expand your effective storage volume without taking a single square centimetre of floor space.
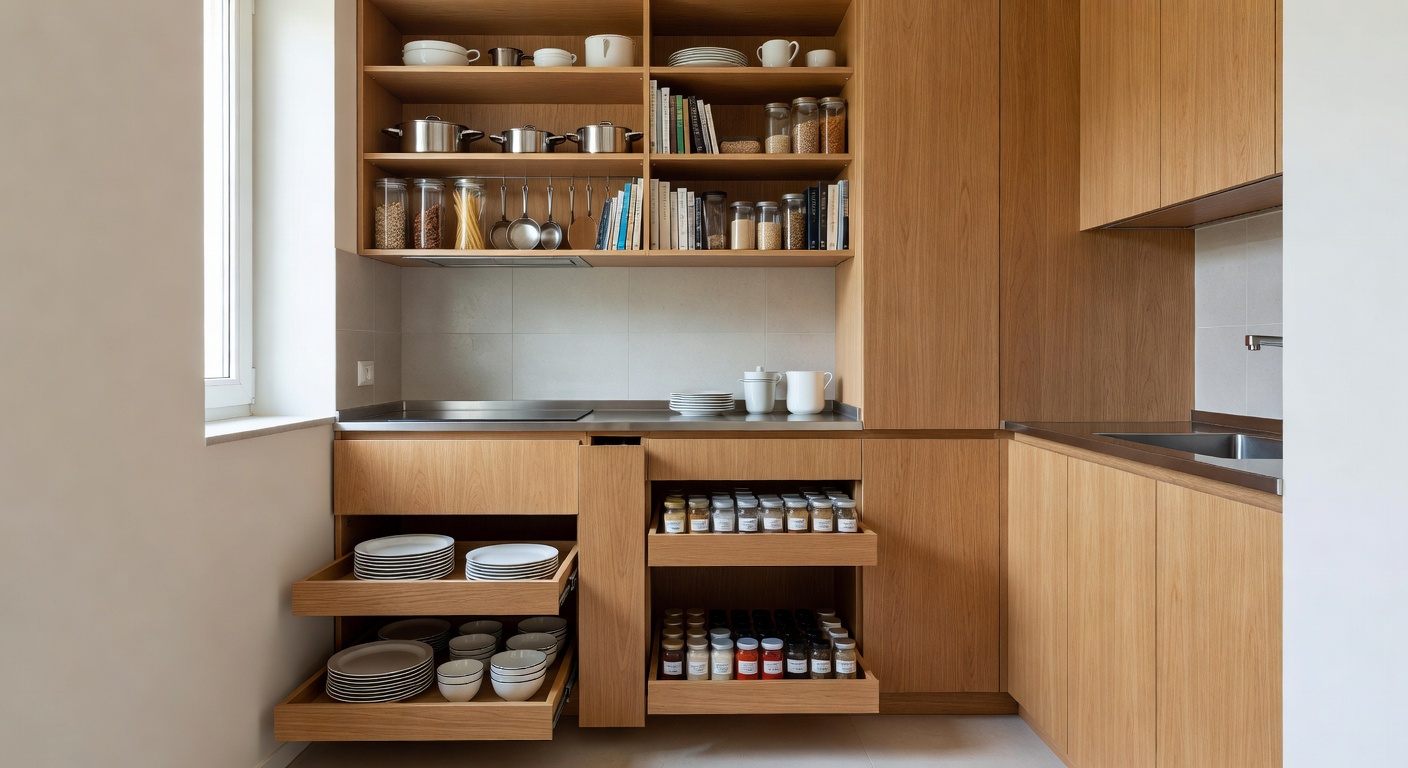
Floor-to-ceiling cabinets — 40% more storage
Eight proven systems for maximising height in any small kitchen — from no-drill options to full cabinet installations.
Extend standard kitchen cabinets all the way to ceiling height. The topmost zone stores rarely accessed items while keeping everyday essentials at eye level.
High ImpactFloating shelves installed above counters or on bare walls deliver instant storage without the cost of cabinets. Style them to display beautiful items while storing practical ones.
Quick InstallSuspend pots and pans from the ceiling above an island or peninsula. Frees 2+ sq ft of cabinet space and turns cookware into a visual design feature.
Counter SaverMount a magnetic strip on any vertical surface — backsplash, side panel, or wall. Keeps knives accessible, visible, and safely stored without a bulky block on the counter.
No-Drill OptionThe back of cabinet doors is prime, ignored real estate. Install wire racks, spice holders, or foil/wrap organisers to create storage that doesn't take up shelf space.
Hidden SpaceA full pegboard wall panel transforms a blank surface into a fully customisable storage grid. Hooks, shelves, bins, and baskets can be repositioned as your needs change.
FlexibleDouble the capacity of any existing shelf by adding a second tier on top. Ideal for plates, mugs, tins, and spices — converts one shelf into two with no installation required.
No ToolsSlim pull-out towers (15–20cm wide) fill the gaps between appliances or beside the fridge. Pantry-style vertical pull-outs hold spices, tins, bottles, and baking essentials.
Gap Filler
Wall shelves — style meets function
Open shelves are transformative when executed well — and disappointing when they become cluttered ledges. The difference lies in knowing when to use them, how to style them functionally, and what specifications to follow.
The key principle: open shelves should display items you use daily and are proud to show. Everything else stays behind a door. This natural edit keeps shelves tidy while making frequently used items even more accessible.
| Specification | Recommendation |
|---|---|
| Shelf spacing | 25–30 cm for mugs, glasses, small items |
| Shelf spacing | 35–40 cm for plates, bowls, taller items |
| Shelf depth | 25–30 cm standard; 20 cm for spice rows |
| Max load (solid wood) | 15–20 kg per bracket pair (60 cm span) |
| Max load (floating) | 10–12 kg per bracket pair — check fixings |
| Lowest shelf height | Min 45 cm above counter surface |
| Styling ratio | 70% functional items, 30% decorative |
A well-installed floating shelf lasts decades. Follow these steps to ensure yours is level, secure, and capable of supporting a full load.
Mark the desired shelf heights on the wall with a pencil. Use a spirit level to draw horizontal reference lines. Consider the height of items to be stored — allow sufficient clearance above the tallest item on each shelf. Photograph the layout before drilling.
Tip: Stand in your natural cooking position and test reach before committingUse a stud finder to locate timber or metal studs behind the plasterboard. Mark stud centres clearly. Use a cable and pipe detector to identify hidden electrical cables, water pipes, and gas lines before drilling anywhere. Never skip this step.
Stud spacing is typically 40 cm or 60 cm in most European and UK buildingsFor shelves bearing significant weight, fix directly into studs with 60mm wood screws. On masonry walls, use 8mm rawl plugs with M6 bolts. For lightweight shelves on plasterboard only, use cavity fixings rated to at least double the expected load.
Rated fixing load should be 3× the expected shelf weight for a safety marginDrill pilot holes at your marked positions, insert wall plugs if required, and fix the first bracket. Hold it against your level line and tighten. Fix the second bracket at the opposite end, checking it is level with the first using a spirit level placed across both.
Always fix the end brackets first; add intermediate brackets for shelves over 90 cmPlace the shelf board onto the brackets and check once more for level. Mark and pre-drill screw holes up through the bracket into the underside of the shelf. Fix with appropriate screws — do not overtighten and split the board. Fill and paint any visible fixing points.
For hardwood shelves, always pre-drill to prevent splitting when driving screwsBefore adding your kitchen items, perform a load test by placing a weight equal to the intended load on the shelf for 10 minutes. Check for any flex or movement. Once confirmed secure, arrange items using the 70/30 functional-to-decorative ratio. Step back and adjust for visual balance.
Re-check all fixings after 30 days — fixings can settle slightly in the first month